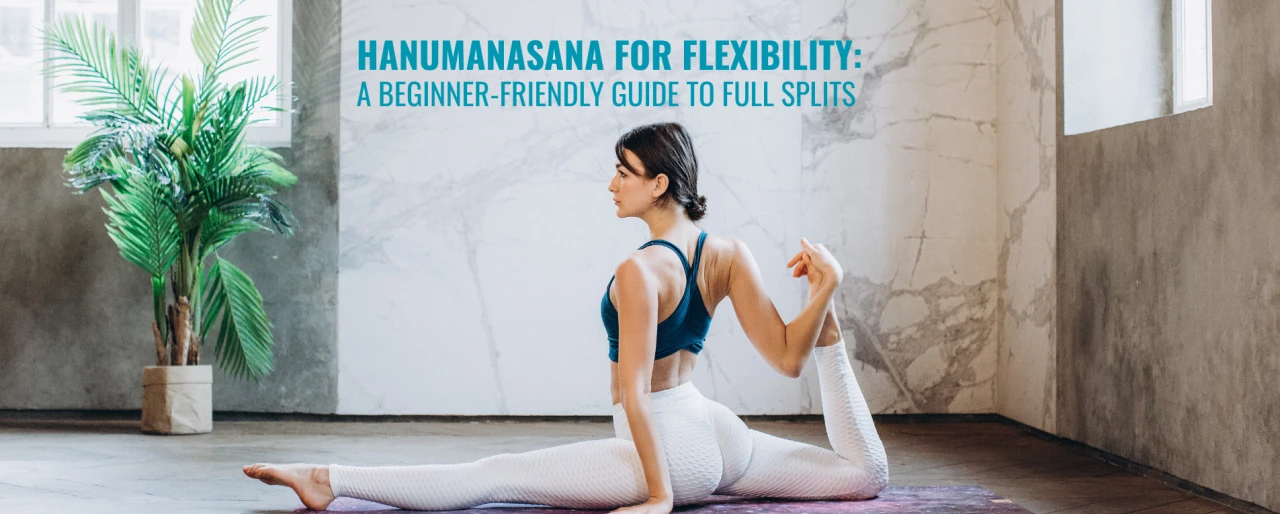
Hanumanasana, commonly known as the full splits pose, is a powerful posture that builds flexibility, strength, and deep focus. While it may look intimidating, with the right warm-up, alignment, and patience, even beginners can start their journey toward this inspiring asana.
In this guide, you will learn how to practice Hanumanasana step by step, how to prepare your body safely, common mistakes to avoid, and how to progress at your own pace without forcing your muscles or joints.
What Is Hanumanasana?
Hanumanasana is named after Lord Hanuman, the symbol of devotion, courage, and strength in Indian mythology. The pose represents Hanuman’s legendary leap across the ocean. Practicing this asana is not only about achieving the full splits, but also about cultivating dedication, patience, and inner trust in your own journey.
Physically, Hanumanasana stretches the hamstrings, hip flexors, groin, and quadriceps, while strengthening the legs and engaging the core. It is a deep pose that requires proper preparation, mindful breathing, and gradual progression.
Benefits of Practicing Hanumanasana
When approached with awareness and consistency, Hanumanasana offers a wide range of physical and mental benefits:
- Improves hamstring flexibility: Deeply stretches the back of the thighs, reducing tightness and stiffness.
- Opens the hip flexors: Releases tension in the front of the hips, especially beneficial for people who sit for long hours.
- Strengthens the legs and core: Engages stabilizing muscles to maintain balance and alignment.
- Enhances body awareness: Teaches you to listen to subtle sensations and respect your physical limits.
- Builds patience and mental resilience: Progress in this pose is slow and steady, helping you develop discipline and focus.
Important Safety Tips Before You Start
Because Hanumanasana is a deep stretch, it is important to prioritize safety. Always practice with care and avoid pushing your body too hard:
- Always warm up your body before attempting splits.
- Use props like yoga blocks, bolsters, or folded blankets for support.
- Never bounce or force your body into the pose.
- Stop immediately if you feel sharp, pinching, or tearing pain.
- Focus on slow, deep breathing to help muscles relax.
If you have existing injuries in your hips, knees, hamstrings, or lower back, consult a qualified yoga teacher or healthcare professional before attempting this pose.
Warm-Up Poses for Hanumanasana
A good warm-up prepares your muscles and joints for deeper stretching. Here are some beginner-friendly poses to practice before moving toward Hanumanasana:
- Cat-Cow (Marjaryasana–Bitilasana): To mobilize the spine and gently activate the core.
- Low Lunge (Anjaneyasana): To stretch the hip flexors and quadriceps.
- Half Splits (Ardha Hanumanasana): To warm up the hamstrings gradually.
- Seated Forward Bend (Paschimottanasana): To improve hamstring and lower back flexibility.
- Reclined Hand-to-Big-Toe Pose (Supta Padangusthasana): To stretch one leg at a time with support.
Step-by-Step Guide to Hanumanasana (Full Splits)
Practice the pose slowly, with full awareness of your breath and body. Here is a beginner-friendly, step-by-step approach:
Step 1: Start in a Low Lunge
Begin in a low lunge with your right foot forward and your left knee on the mat. Place your hands on blocks or on the floor beside your front foot. Keep your front knee stacked above the ankle and your hips squared to the front of the mat.
Step 2: Move into Half Splits (Ardha Hanumanasana)
Slowly shift your hips back so that your front leg begins to straighten. Flex your front foot and draw the toes toward your face. Keep your spine long and avoid rounding your back. Stay here for a few breaths, feeling the stretch in your hamstrings.
Step 3: Slide the Front Heel Forward
From half splits, gently slide your front heel forward, inch by inch. Simultaneously, slide your back knee further behind you, allowing your hips to lower toward the floor. Use blocks under your hands to support your upper body and reduce strain.
Step 4: Align the Hips
It is common for one hip to rotate outward. Gently draw your front hip back and your back hip forward to square your pelvis. Engage your core and keep your chest lifted, avoiding collapsing into the lower back.
Step 5: Find Your Sustainable Edge
Only go as far as your body comfortably allows. Your hips do not need to touch the ground for the pose to be effective. Stay where you feel a steady, manageable stretch—not pain. Breathe deeply for 5–10 slow breaths.
Step 6: Add the Upper Body Variation (Optional)
If you feel stable, you may bring your hands to your heart, extend them overhead, or rest them on your thighs. Avoid this variation if it compromises your balance or alignment.
Step 7: Gently Come Out of the Pose
To exit, press your hands into the floor or blocks, shift your weight slightly forward, and slowly slide your front heel back and your back knee forward. Return to a low lunge position, then move to tabletop or downward dog. Repeat on the other side.
Common Mistakes to Avoid in Hanumanasana
Avoid these common alignment issues to protect your joints and make your practice more effective:
- Forcing the pose: Pushing into the full splits before your muscles are ready may lead to injury.
- Collapsing in the lower back: Always keep the spine long and the core gently engaged.
- Uneven hips: Letting one hip rotate outward reduces the effectiveness of the stretch and strains the joints.
- Ignoring props: Blocks, bolsters, and blankets are valuable tools, not signs of weakness.
- Breath holding: Holding the breath increases tension; slow breathing supports relaxation and release.
How Often Should Beginners Practice Hanumanasana?
Flexibility develops gradually. As a beginner, you can practice the preparatory poses and gentle splits work about 3–4 times per week, allowing your muscles time to rest and recover in between sessions.
Progress might be slow at first, but consistency matters more than speed. Celebrate small improvements, such as increased comfort in half splits or deeper forward bends, instead of focusing only on reaching the full pose.
Mindful Breathing and Mental Focus in Hanumanasana
Hanumanasana is not just a physical stretch; it is also a powerful practice for mental focus and emotional release. When you stay with your breath and observe sensations without judgment, you train your mind to remain calm even in intense situations.
Try synchronizing your breath with your awareness:
- Inhale to lengthen the spine and create space.
- Exhale to relax tight muscles and soften resistance.
- Notice thoughts that arise and let them pass without attachment.
Deepen Your Practice with Structured Yoga Training
If you feel inspired to explore Hanumanasana and other advanced asanas in a more systematic way, joining a comprehensive training program can be very supportive. A Nepal yoga teacher training offers an immersive environment where you learn proper alignment, anatomy, sequencing, and safe progression under experienced guidance.
For beginners who want a solid foundation in asana practice, philosophy, and teaching skills, a 200 hour yoga teacher training is an ideal starting point. It not only helps you deepen your personal practice, but also prepares you to guide others with confidence and care.
Who Should Avoid or Modify Hanumanasana?
You may need to avoid or modify this pose if you have:
- Acute hamstring, groin, or hip flexor injuries.
- Severe knee or hip joint issues.
- Lower back problems that are aggravated by deep forward bends.
If you fall into any of these categories, work with a qualified teacher and focus on gentler variations and therapeutic stretches instead of full splits.
Beginner-Friendly Variations of Hanumanasana
You do not need to reach the floor in full splits to benefit from this practice. Try these variations:
- Supported Hanumanasana: Place a bolster or several folded blankets under your hips for extra support.
- High Half Splits: Keep the back knee slightly closer in and avoid sliding all the way out.
- Wall-Assisted Splits: Use the wall to support your back leg or upper body as you explore your range safely.
Final Thoughts: Honor Your Journey, Not Just the Pose
Hanumanasana is a beautiful expression of strength, flexibility, and devotion, but it is not a pose you need to “achieve” overnight. Every millimeter of progress is a reflection of your patience, consistency, and self-awareness.
Approach this practice with humility and curiosity. Focus on the quality of your breath, the alignment of your body, and the messages your muscles and joints are sending you. Over time, you will notice not only more flexibility in your legs, but also more openness in your mind and heart.
Whether you are practicing at home or deepening your journey through a Nepal yoga teacher training or a structured 200 hour yoga teacher training, remember that the true essence of yoga lies in awareness, compassion, and steady effort.